
Recent enhancements to the FIRB Application Portal (Portal) now enable applicants to add multiple contacts to their foreign investment proposals and variation applications. This will increase visibility and improve management of applications as multiple contacts may be able to access, view, edit and submit applications depending on the access settings granted.
How to create a new application
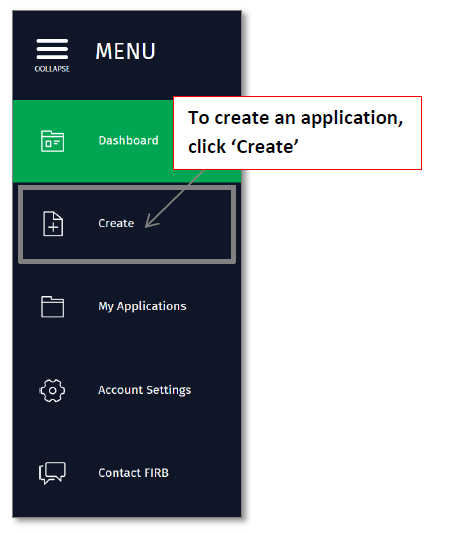
- Create a new application for a proposal or variation by clicking on the 'Create' option in the Application Menu on the left of the screen.
- The 'Select what you would like to create' screen will then display. Select the type of application to be created - Proposal or Variation.
- The 'Initial Questions' screen will then display. Type in a name for the application and complete all mandatory fields by selecting the required information from the drop down lists.
NB: Mandatory fields are represented by the red asterisk (*). - Click on the green 'Save and next' button on the bottom right of the screen.
How to access an existing application
- Select an application from the 'Yet to be submitted' swim lane on the 'Portal Dashboard' screen by clicking on the application name.
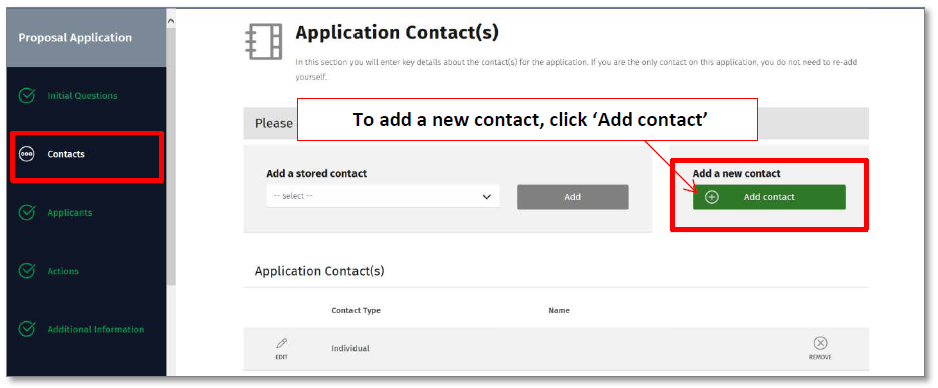
- Select the 'Contacts' option from the 'Proposal Application' menu on the left side of the screen.
How to add a new contact
- On the 'Application Contacts' screen, click on the green 'Add contact' button under the 'Add a new contact' heading to add a new contact to the application.
- The 'Create a new contact' screen will display. Complete all mandatory fields on this screen by typing in and selecting required information from drop down lists.
- Set the 'Contact Settings' by selecting the level of access to the application and type of notifications the contact will receive.
NB: Selecting- 'Access to applications and all notifications' will give access to the application and ensure the contact receives all notifications associated with the application.
- 'Notifications only – all notifications' will ensure the contact receives all notifications associated with the application.
- 'Notifications only – payment notifications' will ensure the contact receives payment notifications only.
- 'No access to application and no notifications' will ensure the contact cannot access the application and will not receive any notifications.
- Click on the green 'Add' button on the bottom right of the screen.
NB: To cancel adding a contact to the application, click on the black 'Cancel' button at the bottom left of the screen.
- The 'Application Contacts' screen will then display. The contact will be listed in the 'Applications Contacts' grid at the bottom of the page.
NB: A contact will only need to be added once. Their details will be saved and stored in the system for future applications and will be visible in the 'Add a stored contact' drop down list.
- To continue with the application, click on the green 'Save and Next' button at the bottom right of the screen.
How to add an existing contact
- On the 'Application Contacts' screen, select contact from the 'Add a stored contact' drop down list. The greyed out 'Add' button will turn green when the contact is selected from the drop down list.
- Click on the green 'Add' button next to the 'Add a stored contact' drop down list.
- The 'Create a new contact' screen will then display. Confirm contact details displayed on the screen and update if required.
- Set the 'Contact Settings' by selecting the level of access to the application and type of notifications the contact will receive.
- Click on the green 'Add' button on the bottom right of the screen.
NB: To cancel adding a contact, click on the black ‘Cancel’ button at the bottom left of the screen.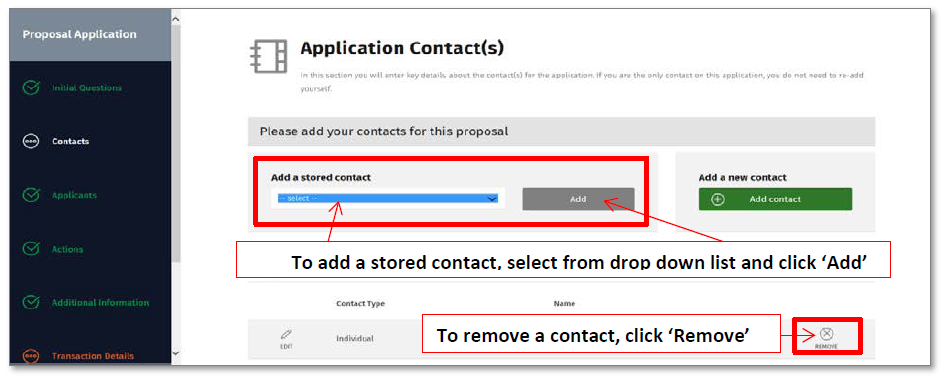
How to remove a contact
- To remove a contact, click on the 'Remove' button next to the contacts name in the 'Applications Contacts' grid.
NB: Contacts can be removed at any time before the application is submitted. After an application is submitted, contacts cannot be removed. Details of the primary applicant will display in the 'Applications Contacts' list at the bottom of the screen. These details cannot be removed from the application.